
How To Build Your Own DIY Terrarium!

Looking for a fun way to teach your child about ecosystems? Look no further than the DIY terrarium kit! A terrarium is a collection of plants, soil, water, and other natural materials covered inside a glass or plastic container. Nature lovers will especially love filling their terrarium with rocks, moss, plants, and even a few bugs! After assembling the terrarium, kids can observe evaporation, condensation, and precipitation inside their very own ecosystem.
With the DIY terrarium kit, you will receive everything you need to assemble the terrarium, including a video tutorial. Here’s what a finished terrarium looks like. Ready to create yours? Here’s how to build your own DIY terrarium.
Step 1: Build Your Kit and Make It Yours
After you’ve received your terrarium kit, you’re ready to get started. Inside the kit, you will find all the necessary pieces, an instructional manual, and a QR code for a tutorial video.
Scan QR code to watch the assembly video.
Follow the instruction manual to help put the wooden frames together.
If you're adding water to your terrarium, make sure you waterproof it! We recommend placing your plants on top of a plate, tray, or planter to keep water contained. For additional support, seal the edges with a hot glue gun!
Kids can decorate their kits in addition to building them - highly recommended!
Step 2: Choose Your Samples
Once the terrarium is assembled, it’s time to fill it with natural materials. Go outside and start collecting some plants to use. Look for small, slow-growing plants as these will work best.

A closed terrarium will create a humid ecosystem, perfect for mosses and tropical plants. Peperomia, polka dot plants, miniature ferns, mosses, and pilea will thrive in this terrarium, you can even add Venus flytraps if you can find some! An open terrarium will stay dry, making it perfect for succulents and cacti.
Step 3: Bring Your Terrarium to Life and Watch It Flourish
Now the fun (and messy) part. Protect your workspace if assembling this indoors. Along with your plant samples, you’ll need some small rocks or pebbles and potting soil. Activated charcoal is a great addition if you have it, this helps keep the soil fresh, removes toxins from the soil, and controls bacteria and fungus.

Add a layer of pebbles to the bottom of the container, about 2 - 3cm.
Add the activated charcoal if you are using it, just scatter some across the top of the pebbles.
Next, add a layer of moss if you have it. This will prevent the soil from running to the bottom of the terrarium.
Add your potting soil, make sure there is enough room for the roots of your plants.
The plants go in next. Use a long-handled spoon to make a hole for your plant and gently place it into the soil. Start with the biggest plants first.
Add any other rocks, moss, or sand to finish up.
Close the lid - or don’t!
Keep the lid of the terrarium open for a dry setting with cacti and succulents or close the lid to make a humid ecosystem with moss and tropical plants.
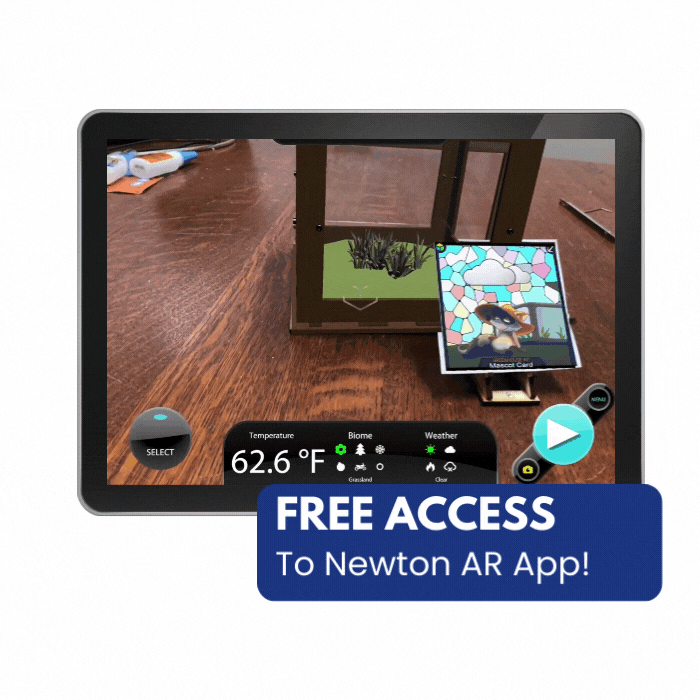
Use Newton AR to Take the Experience to The Next Level
Download the Newton AR app to conduct virtual reality experiments. You can play with the temperate, biome, and temperature of your ecosystem!
Final Thoughts
Keep your terrarium alive by making sure it gets proper sunlight and water. Choose a spot with lots of natural light but not in direct sunlight. Spray your terrarium with water every couple of weeks or when the soil is dry to the touch. A little condensation is to be expected, but if the glass becomes foggy it might be a sign that you are overwatering. Just remove the top to dry out the terrarium.


