
How to Build An At-Home Bottle Rocket
Looking for a fun chemistry lesson you can do at home? Building a bottle rocket is an exciting way for your children to learn about chemical reactions. The combination of vinegar and baking soda creates a chemical reaction that will send your bottle blasting into the sky. This project is a great way to get kids excited about science.
So, how do you build an at-home bottle rocket?
Building a bottle rocket is easy. You only need a few basic materials that you probably have around the house and an outdoor area where you can send the bottle flying.
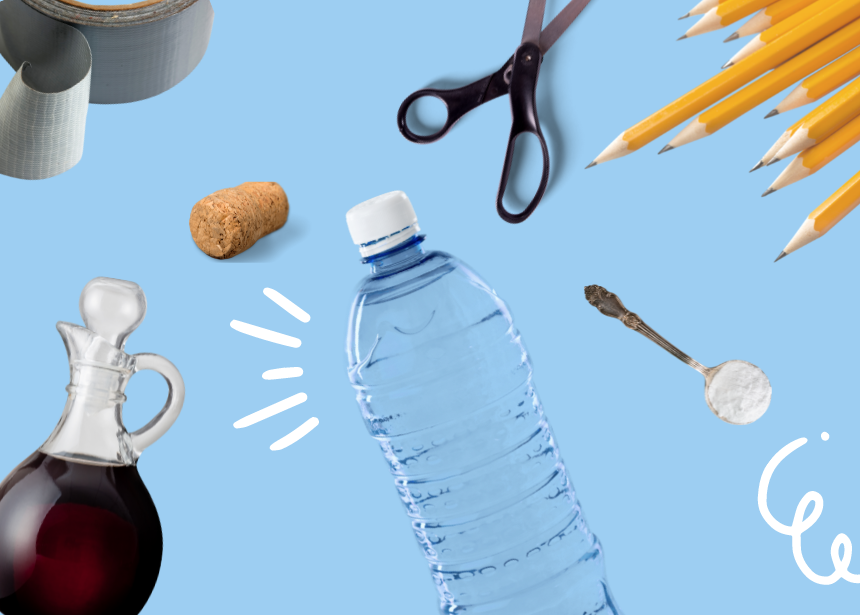
What You’ll Need:
An empty plastic soda bottle (a two-liter works well)
3 tablespoons baking soda
2 cups vinegar
3 wooden pencils (unsharpened)
A cork
Duct tape
Scissors
A funnel
Safety glasses

Safety Tips:
Launch your rocket outside away from any overhead structures. Make sure you have safety glasses on deck to avoid any accidents and don't use a bottle cap instead of a tapered cork! This could cause an undesired explosion.
Step 1: Attach the Legs
Take the empty plastic bottle and tape the wooden pencils evenly around the sides of the bottle. Tape them so that the pencils are about an inch higher than the top of the bottle. They will be the launch pad. Wrap the tape around the bottle and sticks a few times to secure the sticks. Flip the bottle upside down and make sure the sticks are sturdy enough to hold up the bottle.
Step 2: Cork the Bottle
Place the cork in the top of the bottle. You want it to fit nice and snug. If you don’t have a cork, you can try using the original cap of the bottle. A cork works better because you will need to quickly seal the bottle before it launches. If you must use the original cap, it’s safer for an adult to seal the cap so that they can do it as quickly as possible.

Step 3: Decorate the Rocket
Decorate your rocket. You can use construction paper, glitter, stickers, or even decorate the bottle with different colors of duct tape. You might want to give your rocket a name!
Step 4: Prepare for Blastoff
Now that you’ve got your pencils attached, cork sealed, and bottle decorated, you’re ready to prepare for blastoff. Take the bottle outside with your vinegar, baking soda, and safety goggles. Pick an area to set up the rocket and put on your safety glasses. Remove the cork from the bottle and add the vinegar using the funnel.
Step 5: Launch the Rocket
The final step is to add the baking soda, secure the cork, flip over the bottle, and step back! Use the funnel again to add the baking soda. The chemical reaction will begin right away, so you need to quickly put the cork back on and flip the bottle upside down so that the cap is facing the ground. Back up and watch the chemical reaction launch the rocket into the sky!
This at-home science experience is a great way to get kids excited about learning. After the rocket launch, you can follow up with some questions to get your kids thinking about what just happened. Here are a few post-experiment questions you can use:
How high do you think the rocket went?
What made the rocket launch into the sky?
What did you expect to happen?
Did anything happen that surprised you?

For more fun at-home science projects that spark curiosity, check out our maker kit line!